CNC Write!
Rotary and Linear Axis Engraving
Axis Settings - CNC Write - Rotary and Linear Axis Engraving
See details for this section below the image.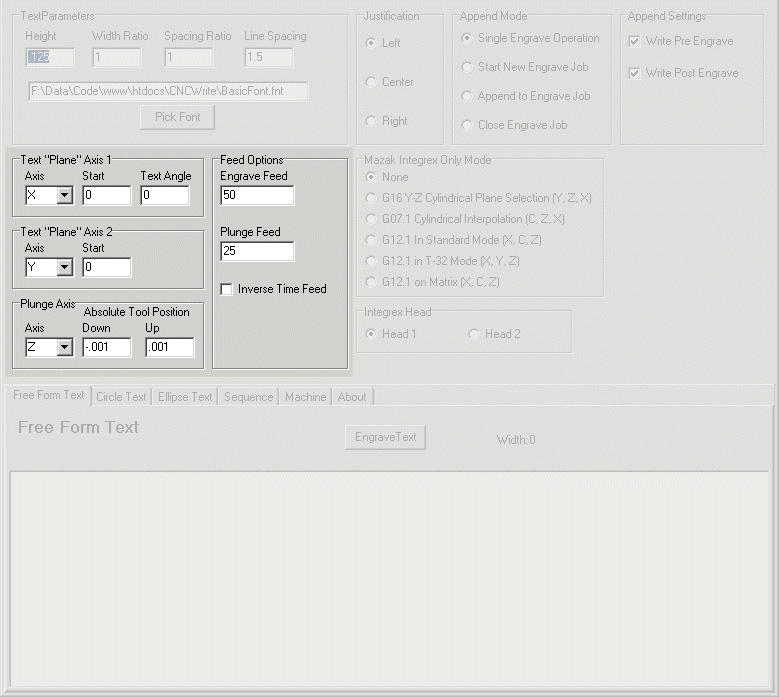
Click Tabs and other sections to see details for that section.
The default settings will engrave text .001 units deep, along the X axis in the XY plane starting at 0,0, on a surface at Z = 0. All rapid moves will be .001 units above the surface to engrave. Note that these settings have slightly different meanings for Circle and Ellipse text.
Axis 1
Axis 1 is the Axis that would be along the length of the line of text (With Text Angle set to 0). This axis can be X, Y, Z, A, B, or C. If A, B, or C is used, the text would wrap around a cylindrical part.
Axis 1 Start is the offset from 0 along Axis 1 where the desired "Justification Point" would be. If Left justification is selected, this would be the start point of the text. If Axis A, B, or C is used, Start is in degrees instead of linear units.
Text Angle is the angle from the Axis 1 that the line of text will be rotated. For example, If engraving in the XY plane you want the text to slop up 30 degrees instead of going straight along the X axis, you would enter 30 for Text angle.
Axis 2
Axis 2 is the Axis that would be along the height of the text (With Text Angle set to 0). Just as with Axis 1 this can be X, Y, Z, A, B, or C. If A, B, or C is used, the line of text would be along the axis of a cylindrical part and the height of the letters would wrap around the part. In this case the letter height should not be so tall as to move more than half way around the cylindrical part.
Axis 2 Start is the offset from 0 along Axis 2 where the desired Justification Point should go. If Axis A, B, or C is used, Start is in degrees instead of linear units.
Plunge Axis
Plunge Axis is the axis used for the depth of the cut. The Plunge Axis can also be set to X, Y, Z, A, B, or C. However it is very unlikely that anything other than X, Y, or Z would be used. Absolute Tool Position Down and Up are used to set depth of the cut and how far over the surface of the part rapids will be at.
If A, B, or C Axis is used for Axis 1 or 2, Down will need to be set to the radius of the cylindrical part minus the depth for engraving, and Up will need to be set to the radius of the part plus the clearance desired during rapid moves. For example, If the part radius is .5, the engrave depth is .001 and the clearance for rapid moves is .002, Down will be set to .5 - .001 or .499 and Up will be set to .5 + .002 or .502.
Feed Options
Engrave Feed is the speed of the tool during all cuts for any segments of the letters engraved. Plunge Feed is the feed only for plunge moves. By default Plunge Feed will be set to half Engrave Feed. That value can be changed after Engrave Feed is set if a different value is desired
Inverse Time Feed is needed on Mills when a rotary Axis is being used.
Home
This, and all properly designed web sites, best viewed with Firefox!

Save your money and the hassel, switch to Mint Mobile